Introduction
You are going to learn how to program your own animation!
<iframe allowtransparency="true" width="485" height="402" src="http://scratch.mit.edu/projects/embed/26818098/?autostart=true" frameborder="0"></iframe>
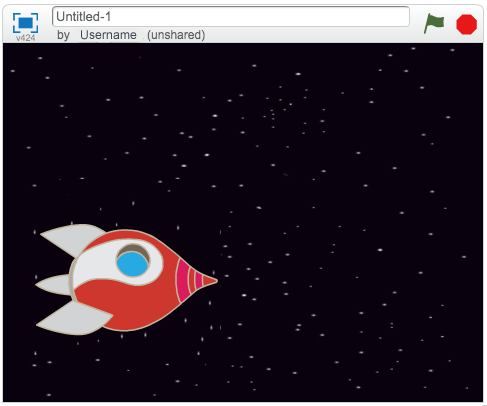
<img src="space-final.png">Step 1: Sprites
Activity Checklist
First, make sure that you have opened up the Scratch editor. You can find the online Scratch editor at jumpto.cc/scratch-new. It should look something like this:
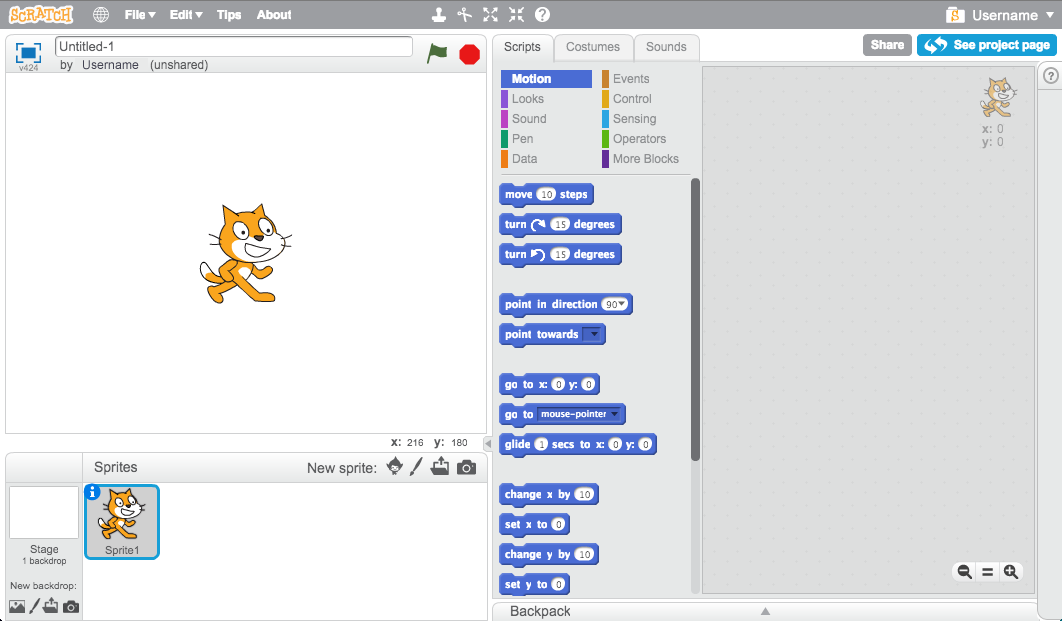
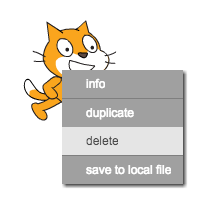
screenshot Before you can start animating, you’ll need to add in a ‘thing’ to animate. In Scratch, these ‘things’ are called ‘sprites’. The cat that you can see is a sprite called Felix, who is the Scratch mascot. Let’s get rid of him for now, by right-clicking on him, and clicking ‘delete’.
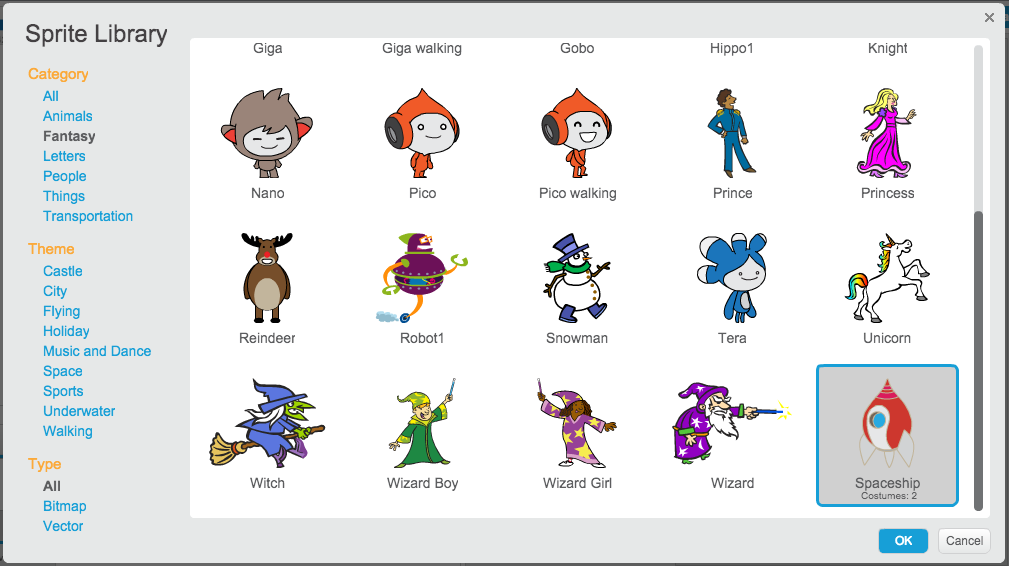
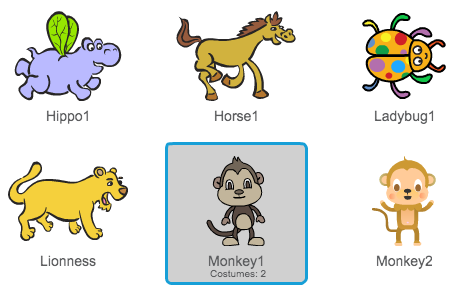
screenshot Next, click ‘Choose sprite from library’ to open up a list of all the available Scratch sprites.

screenshot Scroll down until you see a spaceship sprite. Click on the spaceship, and click ‘OK’ to add it to your animation.
screenshot Click on your new spaceship sprite, and click the ‘Costumes’ tab.
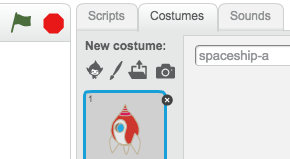
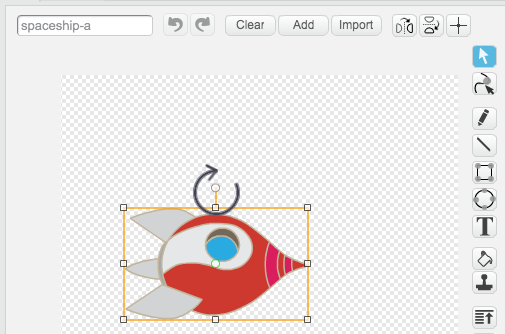
screenshot Use the arrow tool to select the image. Then click on the circular rotate handle, and rotate the image until it is on its side.
screenshot You should now have a big spaceship on your ‘stage’. The ‘stage’ is the area on the left, and is where your animation will happen. Think of it as a performance area, just like a real stage! You can drag the spaceship around the stage to move it.
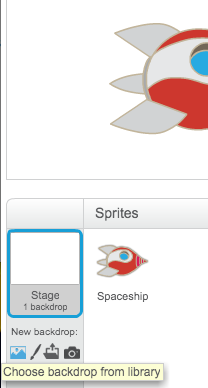
At the moment, the stage is white, and looks pretty boring! Let’s add a backdrop to the stage, by clicking on the ‘Stage’ icon, and then clicking ‘Choose backdrop from library’.
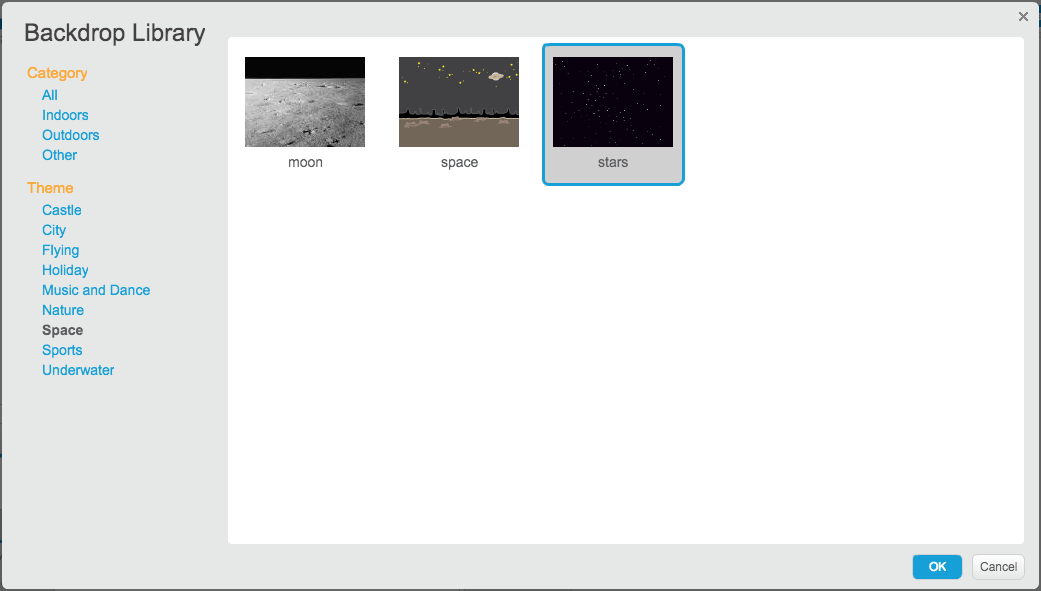
screenshot Click ‘Space’ on the left, and then click the ‘Stars’ backdrop and click ‘OK’ to add it to the stage.
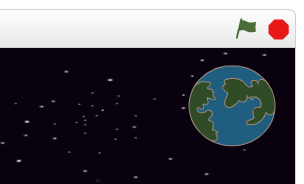
screenshot Your stage should now look like this:
screenshot
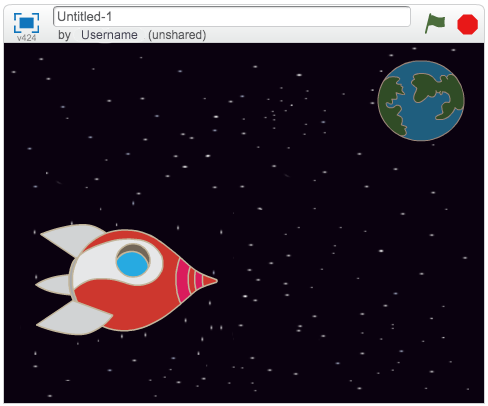
Challenge: Adding another sprite
Can you add another sprite (the Earth) to your stage, so that it looks like this:
Save your project
You should save your work regularly, so that you don’t lose it. First, give your program a name, by typing one into the text box above the stage. You can then click ‘File’ and then ‘Save now’ to save your project.
If you’re using Scratch online, clicking ‘Save’ adds your program to your ‘stuff’, which is an online folder that you can access from anywhere, even from home. You can access your stuff by clicking ‘File’, and then clicking ‘Go to My Stuff’.
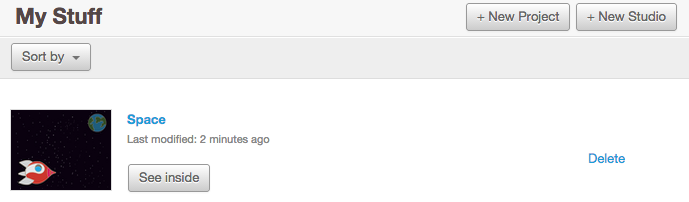
This shows you a list of all your projects. Click ‘See inside’ to continue programming your animation.
If you’re using Scratch online and don’t have a username, you can click ‘Download to your computer’ to save your project.
Step 2: Animating your sprites
Now that you have some sprites, let’s add code to animate them!
Activity Checklist
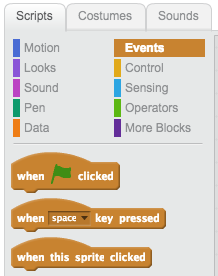
Let’s create a script for the spaceship, by using code blocks. You can find the blocks in the ‘Scripts’ tab, and they are all colour-coded! Drag these 2 blocks into the code area to the right, making sure that they are connected together (like Lego blocks).
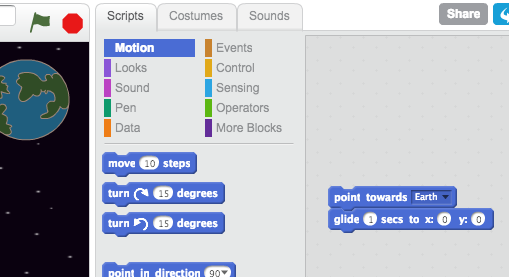
screenshot Change the numbers in the code blocks, so that the code is exactly the same as in the image above. Here is the code that you should add:
    point towards [Earth v]
    glide (1) secs to x:(0) y: (0)
To make the
point towards Earthblock, you’ll have to drag on the block, and then click the down arrow to select your ‘Earth’ sprite.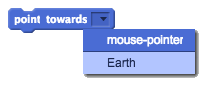
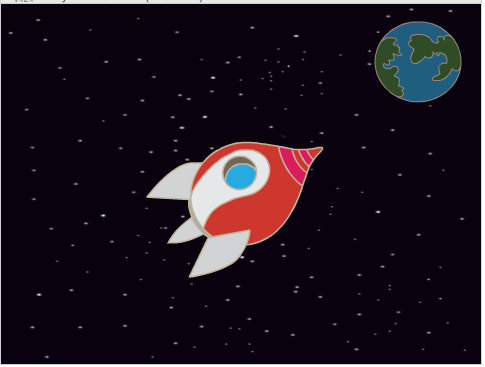
screenshot If you click on the code blocks to run the code, you should see the spaceship turn and move towards the centre of the stage.
screenshot The screen position
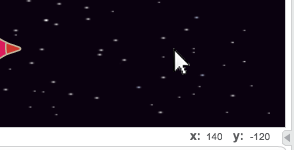
x:(0) y:(0)is the center of the stage. A position likex:(-150) y:(-150)is towards the bottom-left of the stage, and a position likex:(150) y:(150)is near the top-right.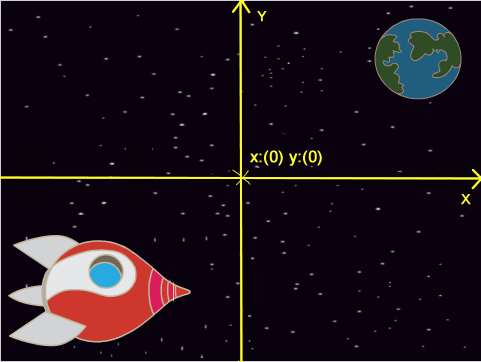
screenshot If you need to know the coordinates of a position on the stage, move the mouse to the position you want and make a note of the coordinates, which are displayed below the stage.
screenshot If you try to click the code again, to run it a second time, nothing happens! That’s because the spaceship is already at the position it’s been told to glide to. Let’s improve your animation, by telling the spaceship to start at the bottom-left of the stage, and point upwards to begin with.
Add some more blocks to your animation, adding them on top of the blocks you already have. Your code should now look like this:
    point in direction (0 v)
    go to x:(-150) y:(-150)
    wait (1) secs
    point towards [Earth v]
    glide (1) secs to x:(0) y: (0)
You’ll find the
wait (1) secsblock by clicking on the orangeControlblocks section.Your spaceship now moves every time you run your code. Try it!
You can also attach your animation code to an ‘event’. This means that the code will run when something happens, such as when the green flag is clicked, a key is pressed or a sprite is clicked.
screenshot Drag an event onto the start of your code, so that your animation starts when the green flag is clicked. This is how your code should look:
    when FLAG clicked
    point in direction (0 v)
    go to x:(-150) y:(-150)
    wait (1) secs
    point towards [Earth v]
    glide (1) secs to x:(0) y: (0)
Try out your animation a few times, by clicking on the green flag just above the stage.
screenshot
Challenge: Improving your animation
Can you change the numbers in your animation code, so that: + The spaceship moves until it touches the Earth? + The spaceship moves more slowly towards the Earth?
You’ll need to change the numbers in this block:
glide (1) secs to x:(0) y:(0)Save your project
Step 3: Animating using loops
Activity Checklist
Another way of animating the spaceship is to tell it to move a small amount (say 4 steps), lots of times. Delete the
glideblock from your code, by right-clicking on the block and clicking ‘delete’. You can also delete code by dragging it off the script area, back into the code blocks area.Once you’ve removed your code, add this code instead:
    when FLAG clicked
    point in direction (0 v)
    go to x:(-150) y:(-150)
    wait (1) secs
    point towards [Earth v]
    repeat (100)
        move (4) steps
    end
The
repeatblock is used to repeat something lots of times, and is also known as a ‘loop’. If you click the flag to try out this new code, you’ll see that it does pretty much the same thing as before.Using a loop to move the spaceship means that you can add more code inside the
repeat (100)loop to do interesting things. Add thechange color effect by 25block into the loop (from the ‘Looks’ section), to repeatedly change the colour of the spaceship as it moves:when FLAG clicked point in direction (0 v) go to x:(-150) y:(-150) wait (1) secs point towards [Earth v] repeat (100) move (4) steps change [color v] effect by (25) endClick the flag to see your new animation.
You can also improve your animation, by making the spaceship get smaller as it moves towards the Earth. Remember to also add code to the top of your animation, to make your spaceship full size to start with.
    when FLAG clicked
    set size to (100)%
    point in direction (0 v)
    go to x:(-150) y:(-150)
    wait (1) secs
    point towards [Earth v]
    repeat (100)
        move (4) steps
        change [color v] effect by (25)
        change size by (-1)
    end
If you try out your animation now, you’ll see that it looks much better than before!
Save your project
Step 4: More loops
Activity Checklist
Let’s add monkey to your animation, who’s lost in space! Start by adding in the monkey sprite from the library.
screenshot If you click on your new monkey sprite and then click ‘Costumes’, you can edit how the monkey looks. Click the ‘Ellipse’ tool, and draw a white space helmet around the monkey’s head.

screenshot Now click ‘Scripts’, and add this code to the monkey, so that it spins slowly in a circle forever:
    when FLAG clicked
    forever
        turn right (1) degrees
    end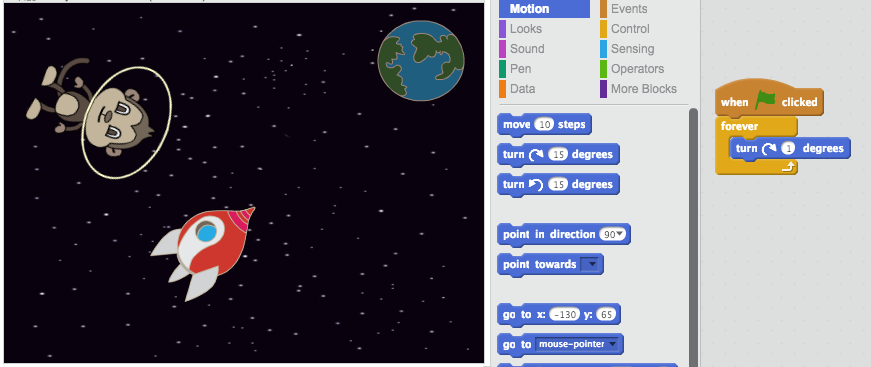
screenshot The
foreverblock is another loop, but this time one that never ends. You’ll have to click the stop button (next to the flag) to end this animation.You can also combine loops. Add a ‘star’ sprite to your animation, and add this code to it:
    when FLAG clicked
    forever
      repeat(20)
        change size by (2)
      end
      repeat(20)
        change size by (-2)
      end
    end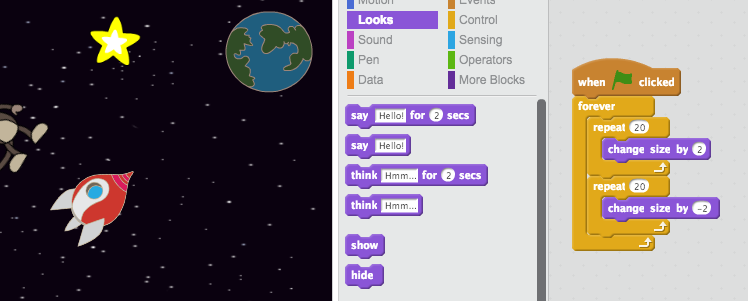
screenshot Click the flag to test out this star animation. What does this code do? Well, the star is made slightly bigger 20 times, and then made slightly smaller 20 times, back to it’s original size. These 2 loops are inside a
foreverloop, so the animation keeps repeating.
Save your project
Challenge: Make your own animation
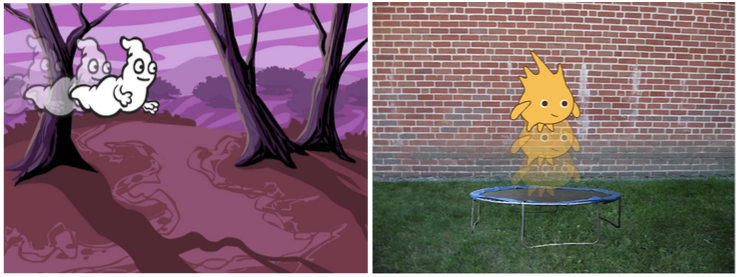
Stop your space animation, and click ‘File’ and then ‘New’, to start a new project. Use what you’ve learnt in this project to make your own animation. It can be anything you like, but try to make your animation match the setting. Here are some examples:
Save your project
Well done! You’ve now completed your first Scratch project. If you are using the online editor, you can let others see your animation by clicking ‘Share’ in the top-right of the Scratch editor!